So this has taken a lot longer to post mainly due to the fact that every time I add in the command to restart the RPi I get locked out of my account for an hour or so as the software my host has on the server thinks I’m trying to do something bad….
Also this post will be updated over the next week or so to add in the rest of the images and also to add clarity around the printing – since I originally wrote this draft changes have been made to some of the print files (and I’ve changed job and lost a few of the original images)
Today we’re going to walk through building our own DeepRacer vehicle to accelerate our machine learning journey thanks to the DeepRacer community. Pro racer Lars “Duckworth” Ludvigsen has created an open source build of the DeepRacer vehicle (GitHub), which makes it easy to get started using readily available parts and helping solve the problem of AWS DeepRacer vehicle availability in some locales.
Overview of solution
The community version of DeepRacer takes the original vehicle code that AWS open sourced in 2021 and re-packages it to run on a Raspberry Pi along the way updating both the operating system and software libraries to more recent versions. The GitHub repository (https://github.com/larsll/deepracer-pi/) lists all of the steps required to get racing at a high level, including all of the software steps, hardware required and 3D print files for mounting on a donor 1/18th scale RC car chassis.
Walkthrough
The purpose of this walkthrough is to detail the steps needed to print, install and build your own DeepRacer vehicle using a Raspberry Pi as the main computer.
This walkthrough comprises the following steps
- 3D printing the computer chassis components
- (Aside from waiting for the purchased parts to arrive, printing the parts you need takes the longest time)
- (Aside from waiting for the purchased parts to arrive, printing the parts you need takes the longest time)
- Raspberry Pi setup
- Initial setup of Raspberry Pi – Flashing the SD card with Ubuntu and updating the operating system
- Community DeepRacer Pi on GitHub: https://github.com/larsll/deepracer-pi/
- DeepRacer vehicle software install – Installing the required packages prior to installing the DeepRacer vehicle software
- Car build
- Raspberry Pi build – Adding the (optional) cooling fan, GPIO riser, servo hat and camera
- Chassis and Raspberry Pi mounting – Bringing it all together
Prerequisites
For this walkthrough, you should have the following prerequisites:
- Required hardware (see complete list at the end)
- Access to a 3D printer
- Donor 1/18th scale RC car (WL Toys 9×9 model) or AWS DeepRacer vehicle
- An AWS Account to train your models using the DeepRacer console or DRfC
3D Printing the computer chassis components
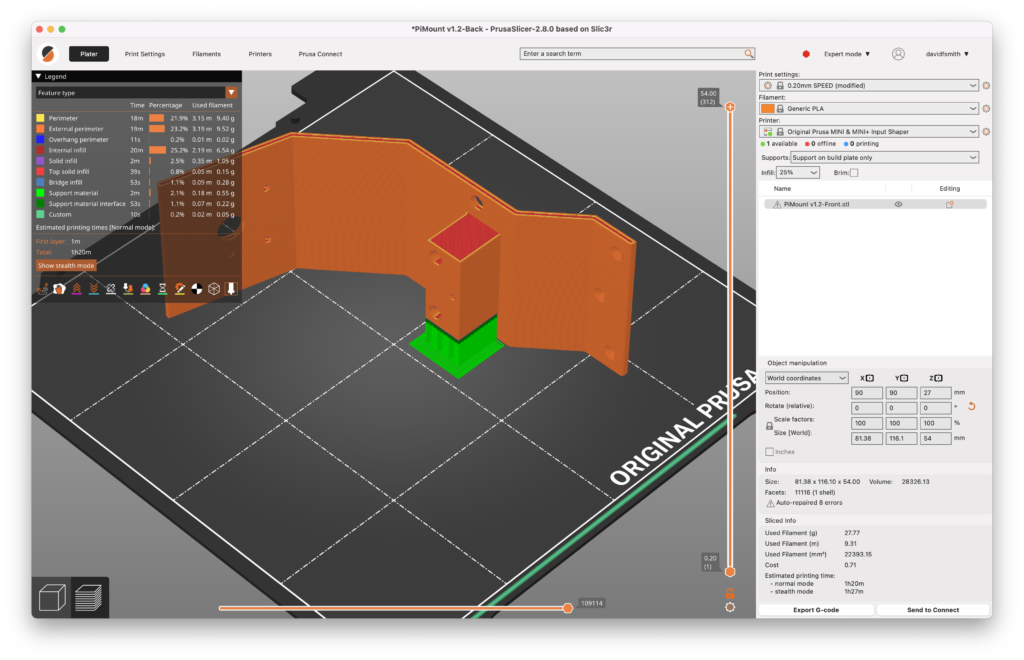
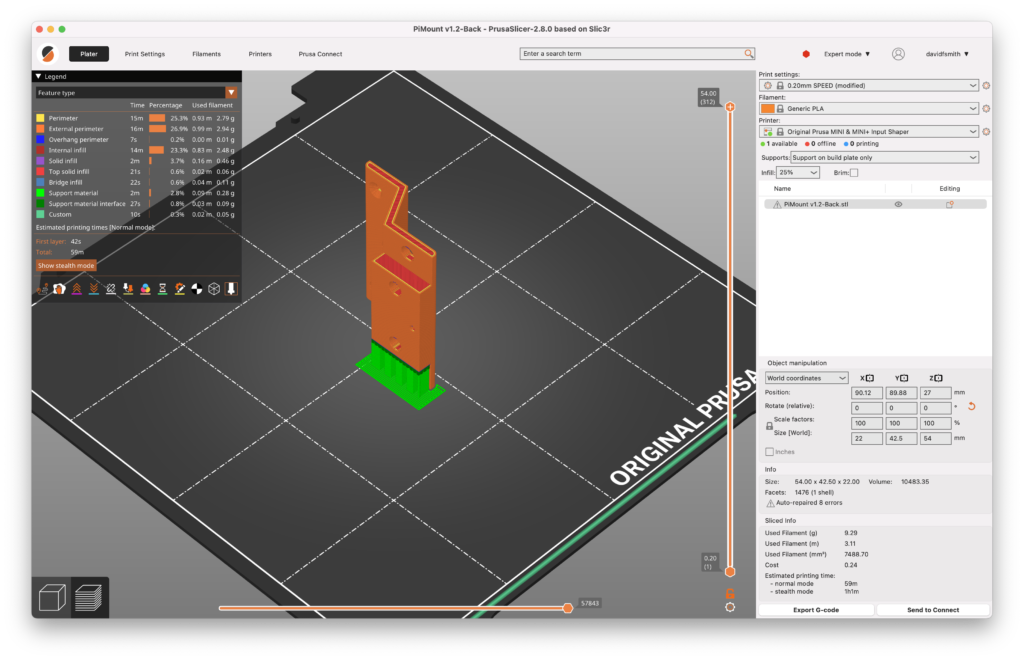
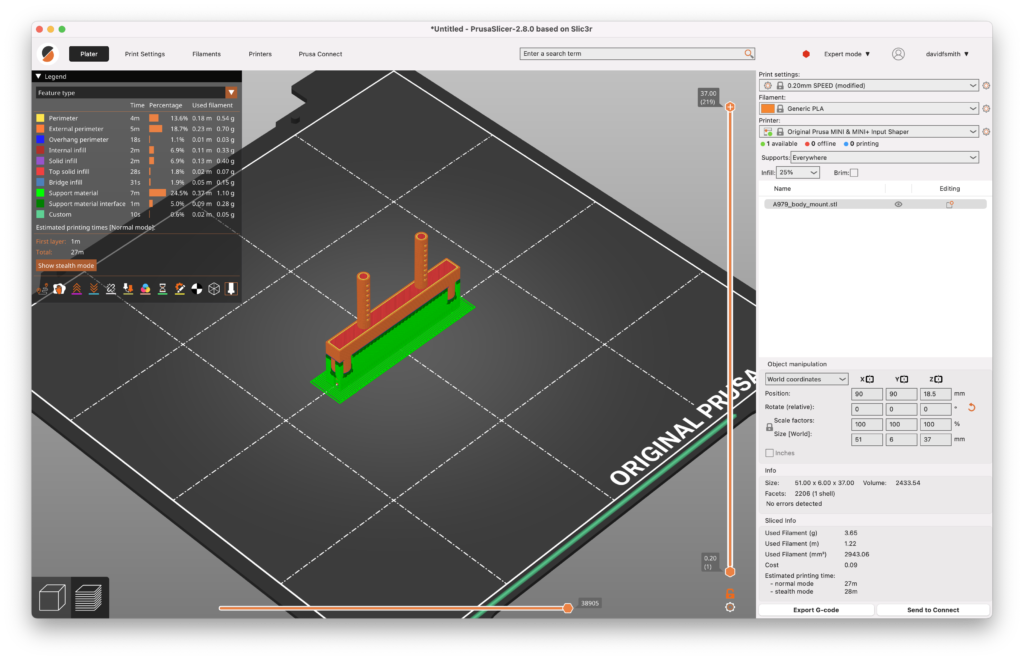
The most time-consuming part is printing the components that are needed for the chassis to mount the Raspberry Pi and camera to the car. There are 4 components to print, front camera mount, main plate, rear mount and body mounts (2). Printing on a Prusa Mini took 12 hours 19 minutes and used a total of 26.87m of PLA (in my case) filament. For printing I have infill set to 25% and printing supports everywhere with a brim to help with bed adhesion (probably overkill but worked for me).
PiMount v1.2 Front – 1 hours 20 minutes – 9.31m of filament
PiMount v1.3 Plate – 2 hours 29 minutes (with legs for DeepRacer) – 13.64m of filament
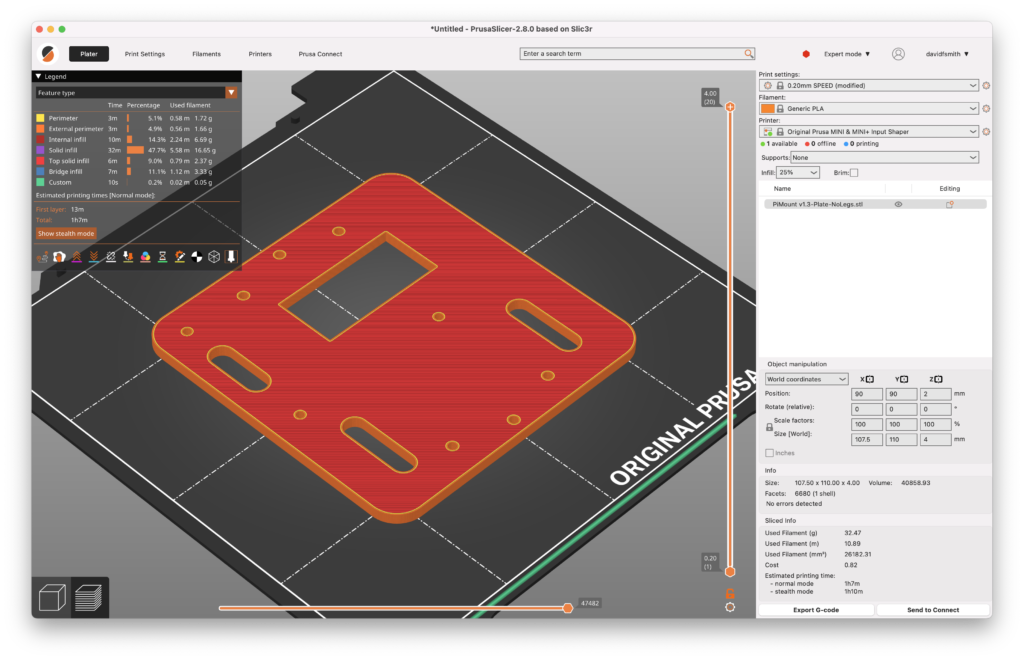
PiMount v1.3 Plate (No legs) – 1 hours 10 minutes (without legs for WL Toys) – 10.89m of filament

PiMount v1.2 Back – 59 minutes – 3.11 m of filament
A979 Body mount (if building for a WL Toys car) – 28minutes (2 needed – be careful removing the supports) – 1.22m of filament for each support
So whilst everything is printing we can move on to the next step and get the Raspberry Pi ready
Raspberry Pi setup
Initial setup of the Raspberry Pi – To prepare the SD card you can either download the Ubuntu 22.04 Server ISO (64 Bit) and write it to an SD card (recommended size is 32Gb or larger) using your preferred tool, or use Raspberry Pi Imager and just select “Other general-purpose OS” → “Ubuntu” → “Ubuntu Server 22.04.4 LTS (64Bit)” and write to your SD card
When prompted if “Would you like to apply OS customisation settings”?” select “Edit Settings” so you are able to set the default username and password as well as the WiFi settings for your local network.
I’ve set the hostname, username and password and added in my WiFi settings, click “Save” which brings you back to “Use OS customisation” prompt
Clicking “Yes” prompts you that you are about to erase all content on the selected SD card, clicking “Yes” again starts the process, depending on the operating system you are using you may get prompted for your password at this point to allow access to removable storage.
Writing the SD card will take a number of minutes depending on the card size and also if you allow the verification of the image.
Now we have our initial image ready we can put the SD card into our Raspberry Pi (RPi) and power the RPi on, it should boot up in ~30 seconds (it might take longer on the first boot as updates are installed) and show up on your network with the hostname as per the configuration (in my case “dr-rpi.local”).
Once on the network we’re going to remote login to the RPi using SSH and install the DeepRacer software from GitHub. Using terminal on your computer, SSH into the RPi (connecting computer and Pi should be on the same network) alternatively you can connect a monitor and keyboard to the RPi and complete the following steps locally.
To remote log into the RPi using SSH:
ssh deepracer@dr-rpi.localThe username and password will be as you specified when flashing the SD card. Once connected to the RPi (either over SSH or locally using monitor and keyboard) we’re going to start by ensuring the operating system is up to date, run the command to get the list of required updates:
sudo apt updateThen we install the updates using:
sudo apt upgrade -yNote: this command just updates the packages to their latest versions and doesn’t change the version of the operating system installed on the RPi
It takes ~15 minutes for the operating system to be updated depending on the number of updates and the speed of your connection. During the update process you might get a kernel version mismatch warning as well as being prompted to restart running services (which is fine to do). The network services also might be restarted as part of this process depending on the updates being applied in which case you’ll need to reconnect via SSH (or just watch the services restart if connected locally using a monitor and keyboard) to reboot the Pi before continuing with the install. To reboot the RPi:
sudo /sbin/shutdown -r nowIt should take ~30 seconds for the RPi to reboot and we can then connect back in using SSH or login locally using the attached monitor and keyboard, now we’re ready to install the DeepRacer perquisites and vehicle software.
Clone the repository containing the installing scripts from GitHub on to the Pi
git clone https://github.com/larsll/deepracer-piChange to the cloned directory and start installing the packages needed for DeepRacer to run
cd deepracer-pi
sudo ./install-prerequisites.sh
Depending on the speed of your internet connection this will take ~15 minutes to run and install all of the required libraries. During this step you may receive the message below when some of the firewall rules are being updated:
Command may disrupt existing ssh connections. Proceed with operation (y|n)?Press Y and the install process will continue without interruption to your SSH connection as the required rules are already in place (if you are connected locally you will still be prompted), once this step has completed reboot the RPi.
sudo /sbin/shutdown -r nowAgain it should take ~30 seconds for the RPi to reboot, log back into the RPi (either over SSH or locally) and now we can finally install DeepRacer, we change directory back into the cloned repository and run the command to install DeepRacer
cd deepracer-pi
sudo ./install-deepracer.sh
This stage takes the longest (aside from the 3D printing) taking up to ~30 minutes.
Note: If you are using a Raspberry Pi v2 Camera module you need to enable the legacy camera setting using “raspi-config”
sudo raspi-configTo enable the camera: “Interface Options” -> “Legacy Camera” -> “Enable”
This finishes the setup of the RPi, time to power down and once the 3D printing has completed we can build out our car.
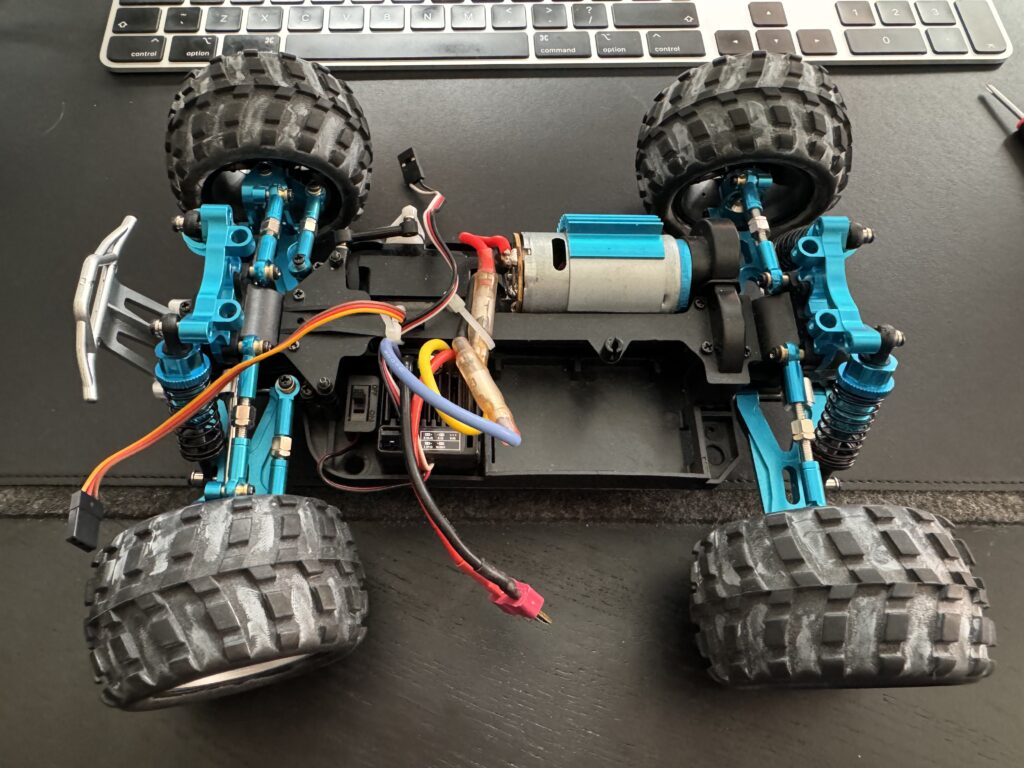
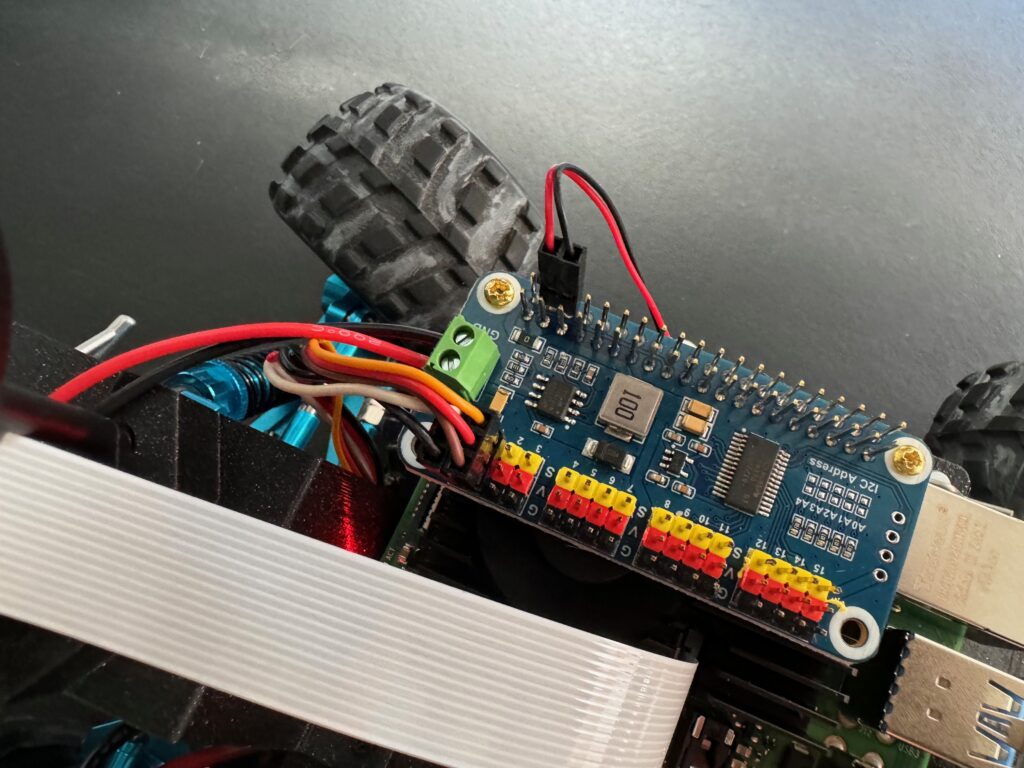
Car build
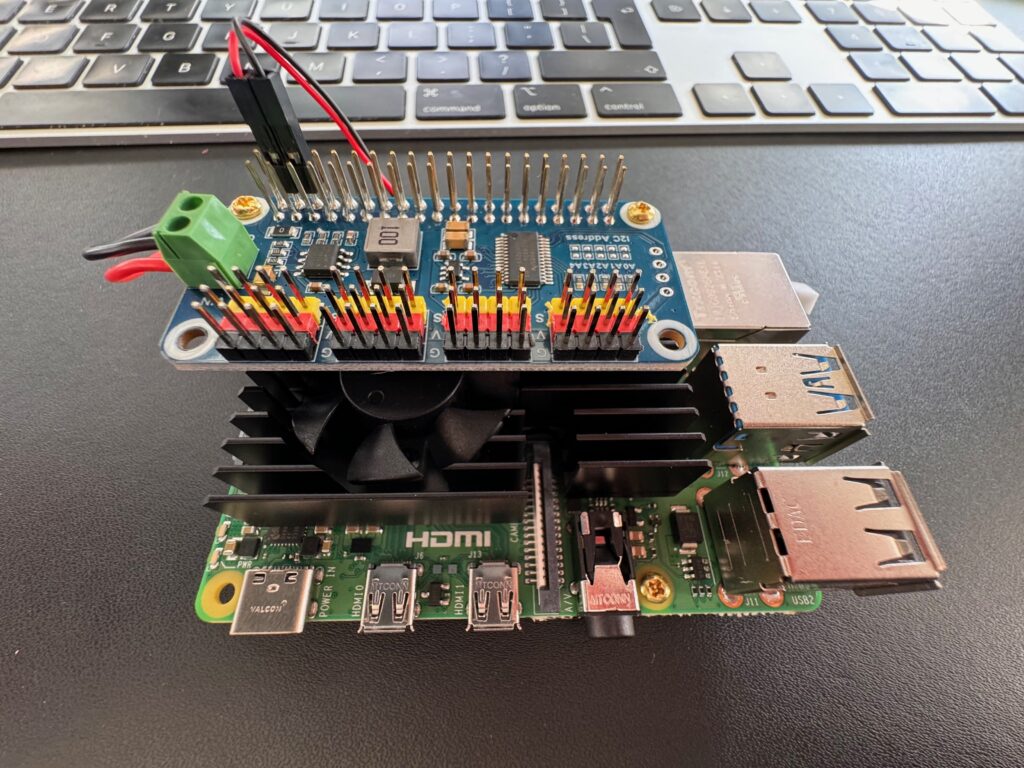
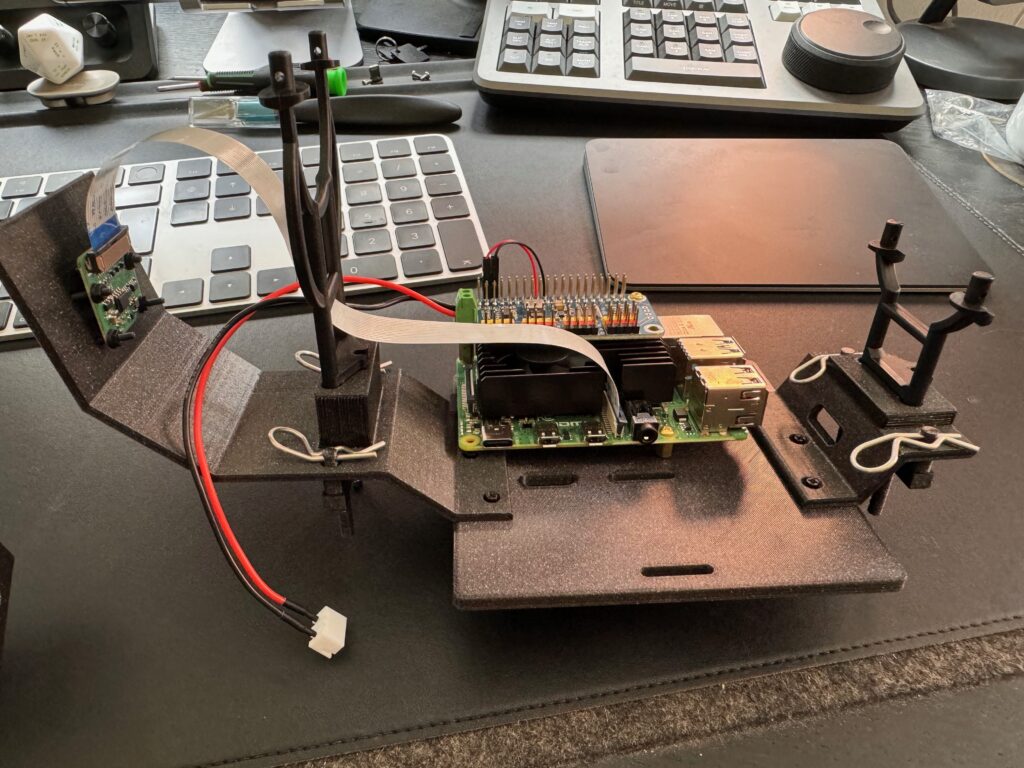
First off let’s build the Raspberry Pi, I’ve got the cooling fan on mine and added a riser to the GPIO, securing the servo driver hat using the M2.5 stand-offs to keep everything together. The cooling fan connects to pin 4 (5V – red) and pin 6 (ground – black) of the GPIO for power and I’ve added a 2S JST connector to the power the servo hat and Raspberry Pi (having removed the middle cable from the JST connector first)

Our RPi is now ready to be mounted on to the 3D printed chassis
The 3D printed parts are bolted together using the M2 nylon stand off kit, 3x 15mm bolts to join the front and rear sections to the main plate and then mount the DeepRacer shell brackets. I’ve also put in 3x brass M2.5 screws into the chassis ready to add the RPi
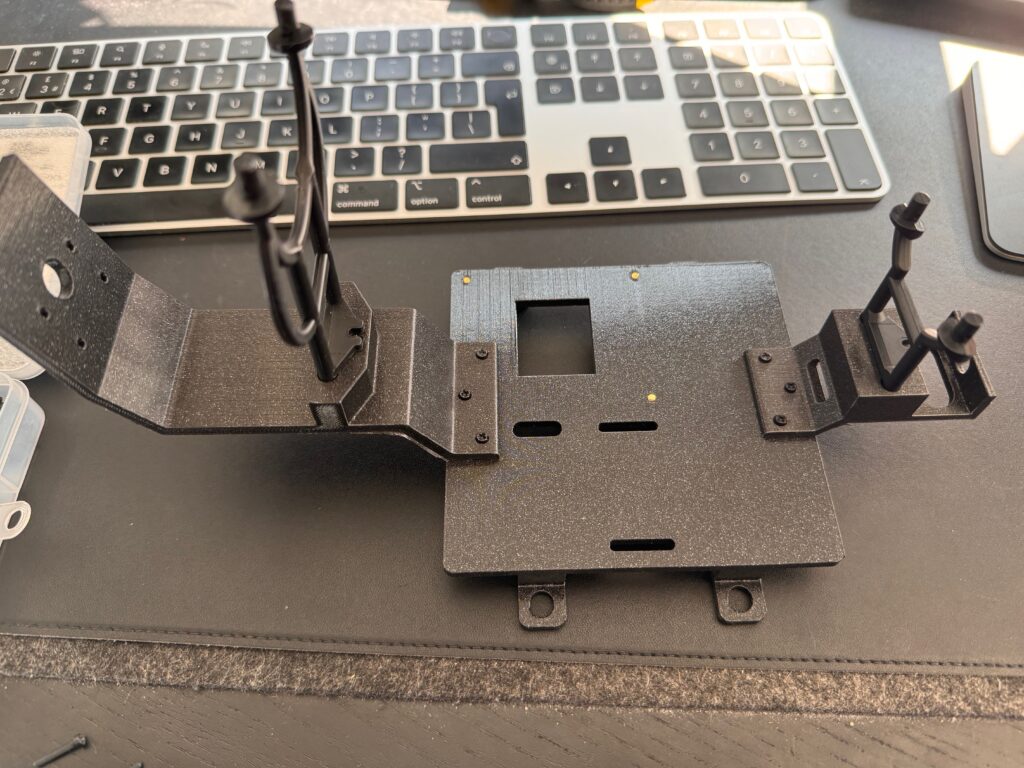
Mounting the camera uses 4x 15mm M2 nylon screws tightening the bottom screws first to get the lower part of the camera as close to the mount as possible.


Connect up 200mm camera cable to the camera module and the Pi and we have our compute unit ready for adding to the car
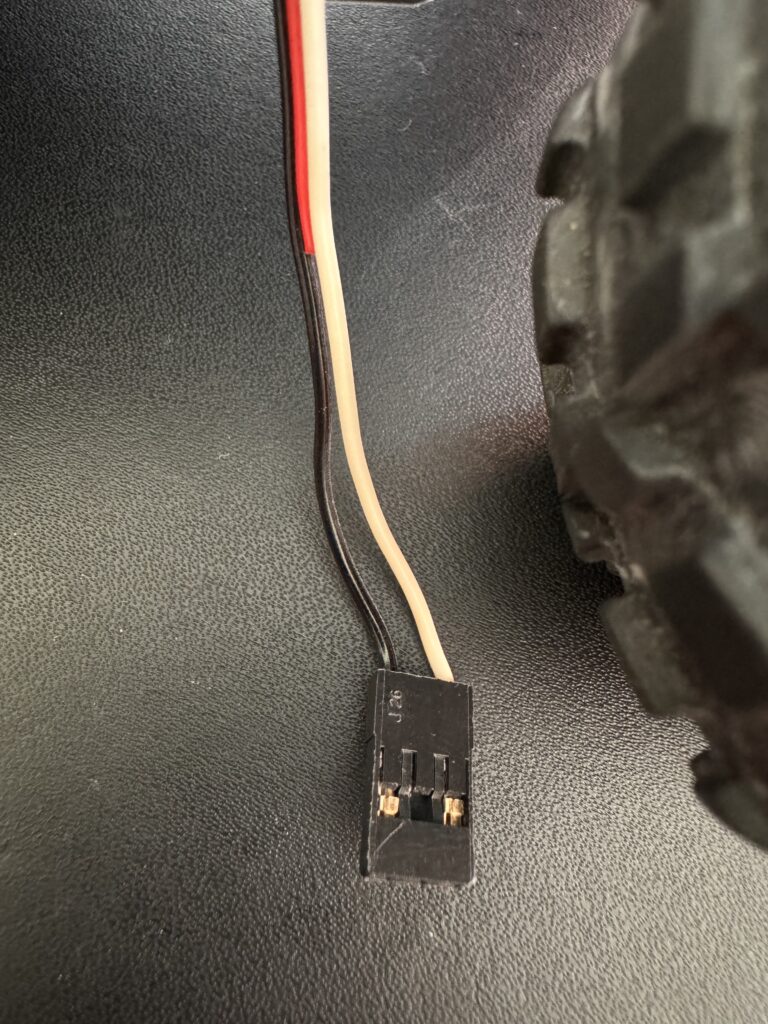
IMPORTANT – Before connecting up everything going racing – You need to remove the middle red wire from the speed controller lead (or you risk damaging your servo hat and Raspberry Pi) – The connector can be carefully removed from the plug and then the wire either cut or tucked out of the way.
Chassis and Raspberry Pi mounting
With both the car chassis and the RPi attached to the 3D printed parts we’re ready for the final assembly.
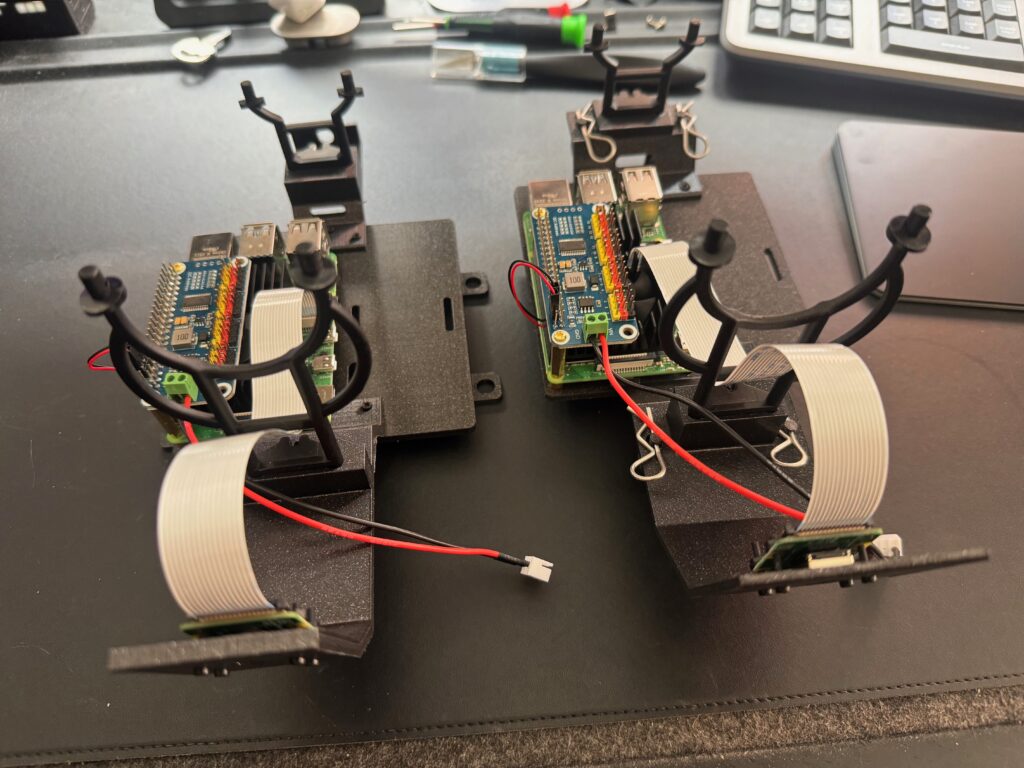
DeepRacer build (left) and WL Toys chase build (right)
We can attach the computer chassis and wire everything up Attach the Raspberry Pi to the car chassis and connect the speed controller wire to 0 on the servo hat (black on the connector to black on the hat and white to yellow) and the steering controller wire to 1 on the servo hat (brown on the connector to black on the hat and yellow to yellow) as below
Plug in your battery using both connectors (one for the car, one for the RPi) wait 30 seconds for the Pi to boot up and you should be able to access the car console and get started with the car calibration – remember there is a switch just behind the left front wheel to turn the car on.

DeepRacer build complete
With everything built and running we’re going to SSH into the RPi again and start the DeepRacer process manually to check everything is working correctly before enabling the DeepRacer service on the car so that it starts automatically in future.
sudo /opt/aws/deepracer/start_ros.shOpen a browser and enter the address of the car https://dr-rpi.local you will get a certificate warning as a self-signed cert is used, but you can accept this and then you should be presented with the DeepRacer car console log in page
The default password for the car console is deepracer and once you have logged in you should get the home page
Enable the camera if it isn’t already, it might be upside down (after all the camera is mounted upside down) so we’re going to edit (or create) /etc/rc.local using nano to rotate the camera image. Ctrl+C out of the running process to stop the DeepRacer service
sudo nano /etc/rc.localAdd the line to solve the issue with the camera image being upside down
v4l2-ctl --set-ctrl=rotate=180Whilst we’re here lets quickly enable DeepRacer as a service on the car, reboot and we’re done.
command to restart an RPi which I can't post....Once the Pi has rebooted open the car console in a browser window again and this time after logging in the camera image should be the right way up.
Now it’s time to start our machine learning journey to train some models and get racing…. see you on the track and good luck.
Conclusion
Through completing this we’ve learnt about installing and updating linux on a Raspberry Pi, with thanks to the community we‘ve installed DeepRacer and 3D printed all of the parts needed to build our own DeepRacer vehicle. We can now test our our DeepRacer models in the real world (or start training models) and see how they compare from the simulator. The physical conditions are very different with light being a major influence in how the car & model performs (whilst the image feed in the car console is in colour, the images used by the model are converted to greyscale to reduce compute resource requirements)
For additional help and support be sure to join the DeepRacer community and get involved.
Parts list
Complete list of the parts needed to complete the build
** coming soon **
Test results